Need some guidance for installing CSH rollng barn door hardware? This 7-step installation guide for round rail hardware is here to help! Whether you’re installing the hardware now or you want to know exactly how to install before you buy, this guide will cover everything you need to know.
You’ll Need
- CSH Round Rail or American Home Collection rolling barn door hardware kit
- Tape Measure
- Pencil
- Hand drill
- Vix bit
- 1/4 – 20 tap
- Wood router (only if installing a recessed pull)
Here’s a guide in video format, if you prefer:
#1 Install Roller Straps
- Determine where you want the roller straps to be positioned on the door. Mark these locations.
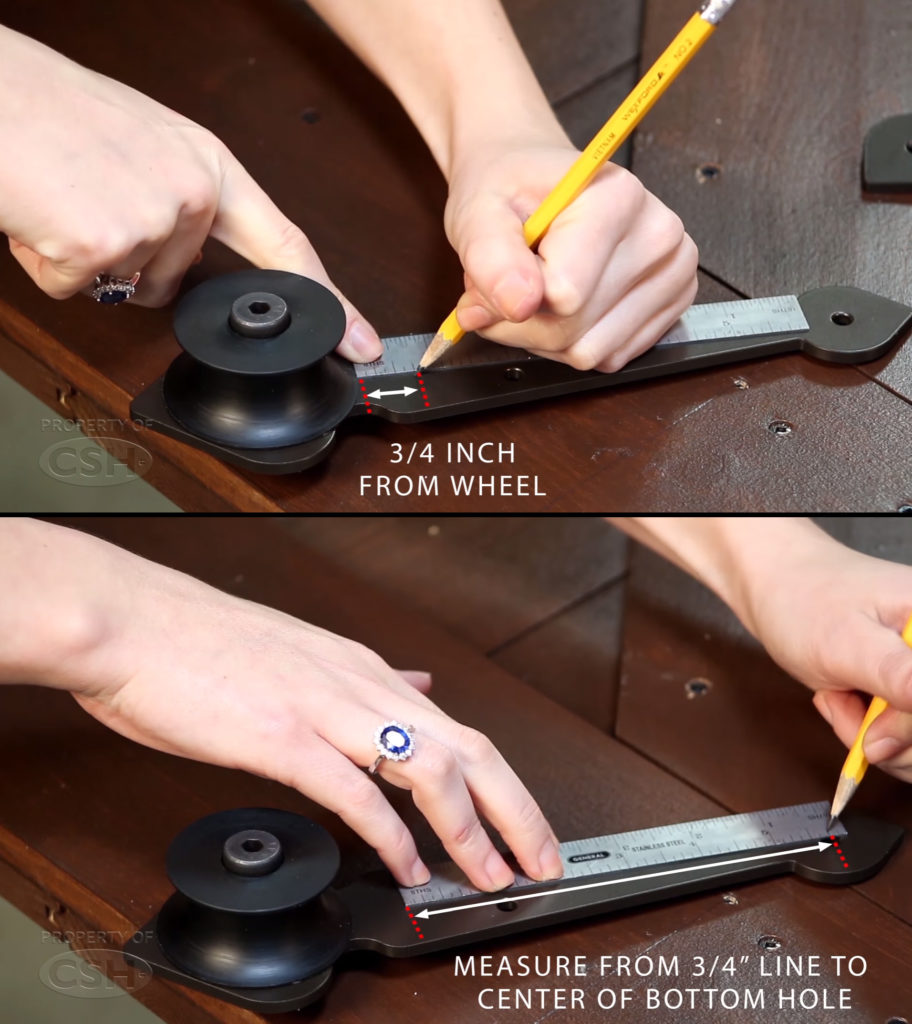
- On the back of your roller strap, measure down 3/4” from the outside diameter of the roller wheel and place a mark on the strap with your pencil. Next, measure from the mark you just made to the center of the bottom fastener hole. Place a mark of this measurement on your ruler and transfer the measurement onto the door.
- Align the roller strap to the mark on the door. Using a drill with a Vix bit, pre-drill the hole and then fasten it with the included fastener.
Note: Proper location of the roller strap will allow the rail to pass between the roller and the top of
the door with a 3/32” gap in between.
#2 Install Handle
Are you installing a standard handle or a recessed pull?
Standard Handle
- Simply align the handle on the door in the location you want, pre-drill the holes with a Vix bit, then secure the handle using the fasteners provided.
Recessed Pull
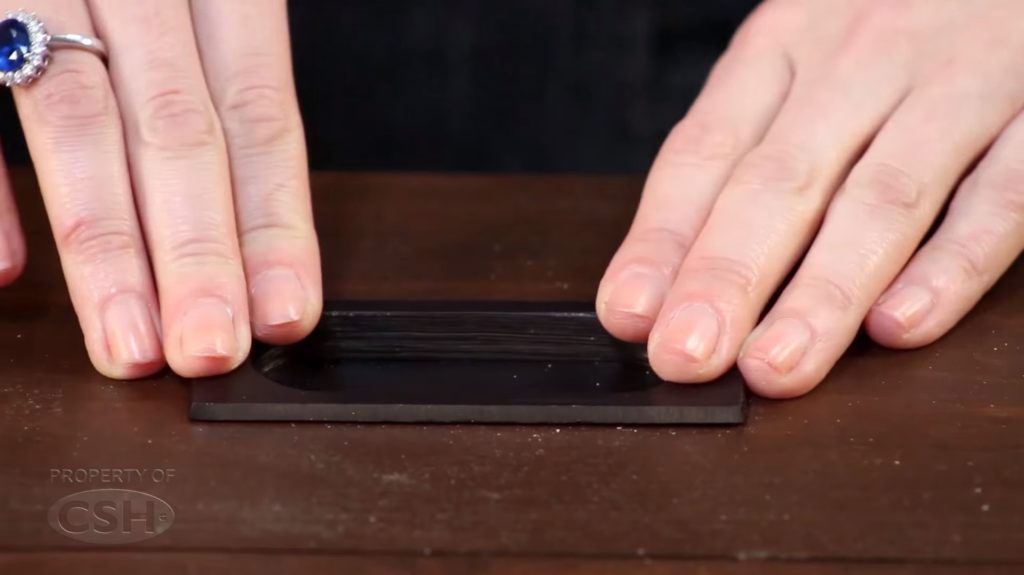
- Mark the location on the door for the flush mount pull, being sure to make room for the door overlap in the opened and closed positions, then router out the door to the depth of the pull.
- Install the pull with the provided nails.
#3 Prepare to Install Rail
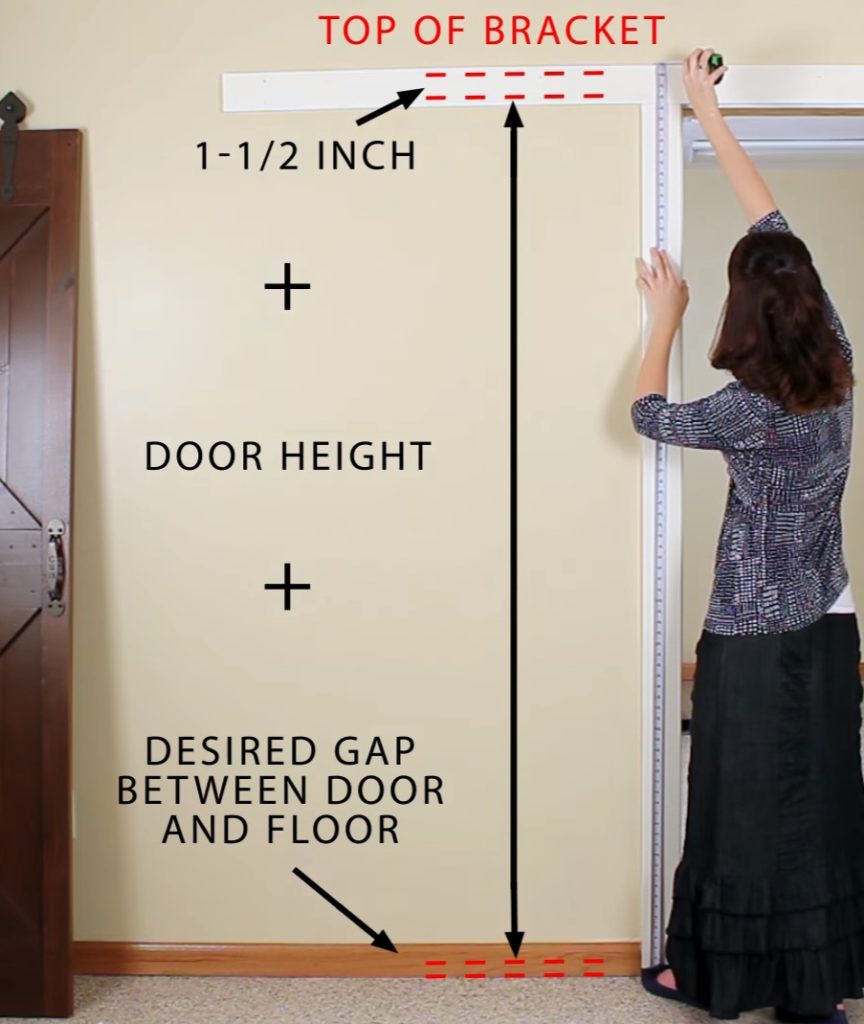
- Now you have to measure for the rail bracket installation. The correct location for the top of the bracket is:
desired gap between door and floor (typically about 1/4”) + door height + 1-1/2”
- Once you have found the correct location, mark it on the door frame or wall.
#4 Install End Cap
- Use a hand drill with a 1/4 – 20 tap to tap both ends of the rail for the end caps.
- Install one of the end caps.
#5 Install Rail
- Slide all the brackets onto the rail and lift the rail into place.
- Align the top of the brackets to the desired mark and pre-drill holes for the bracket fasteners.
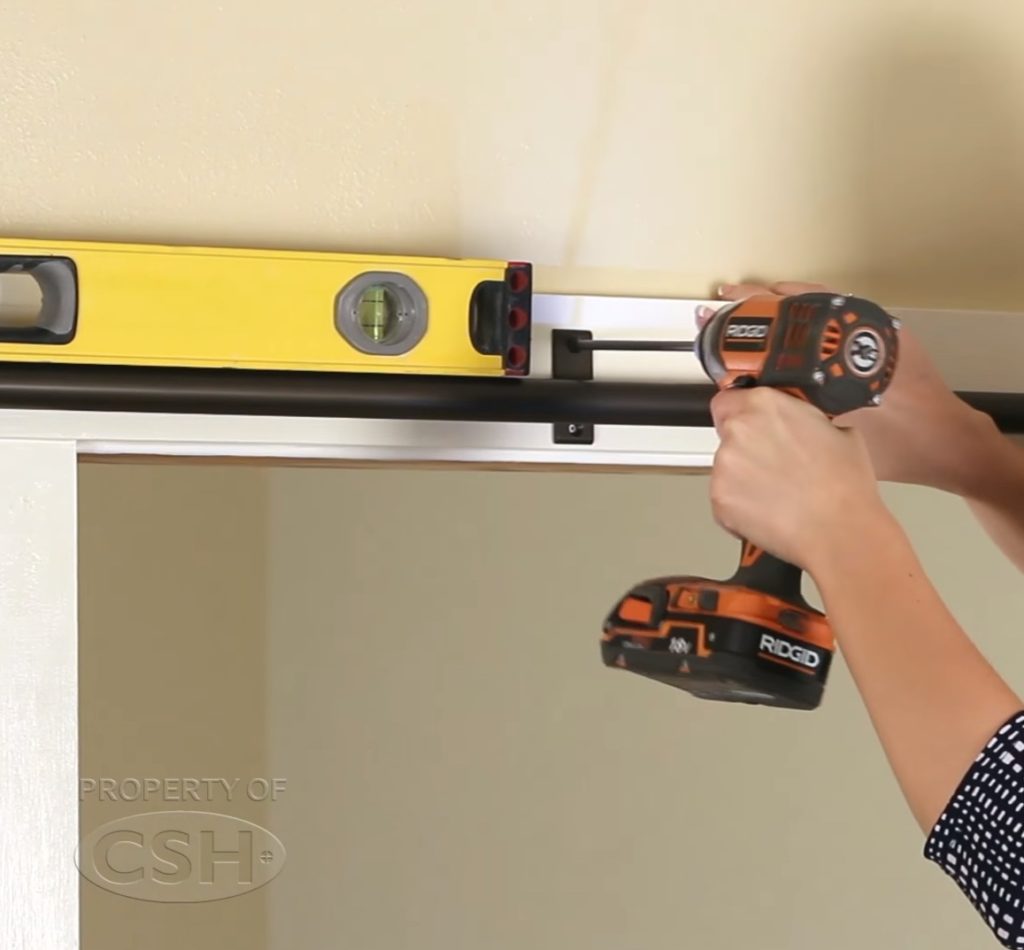
- Fasten one end bracket, then use a level to align the rail and fasten the rest of the brackets to the header.
#6 Install Door
- Slide the door onto the rail from the open end and install the second end cap.
- Center the door in the opening and mark on the door trim the location of the door.
#7 Install Door Stops and Center Guide
Door stop #1
- Apply the door bumper onto the Door Stop.
- Slide the door in to the closed position and align the door bumper to stop the door in this position. Mark the location of the door stop on the trim.
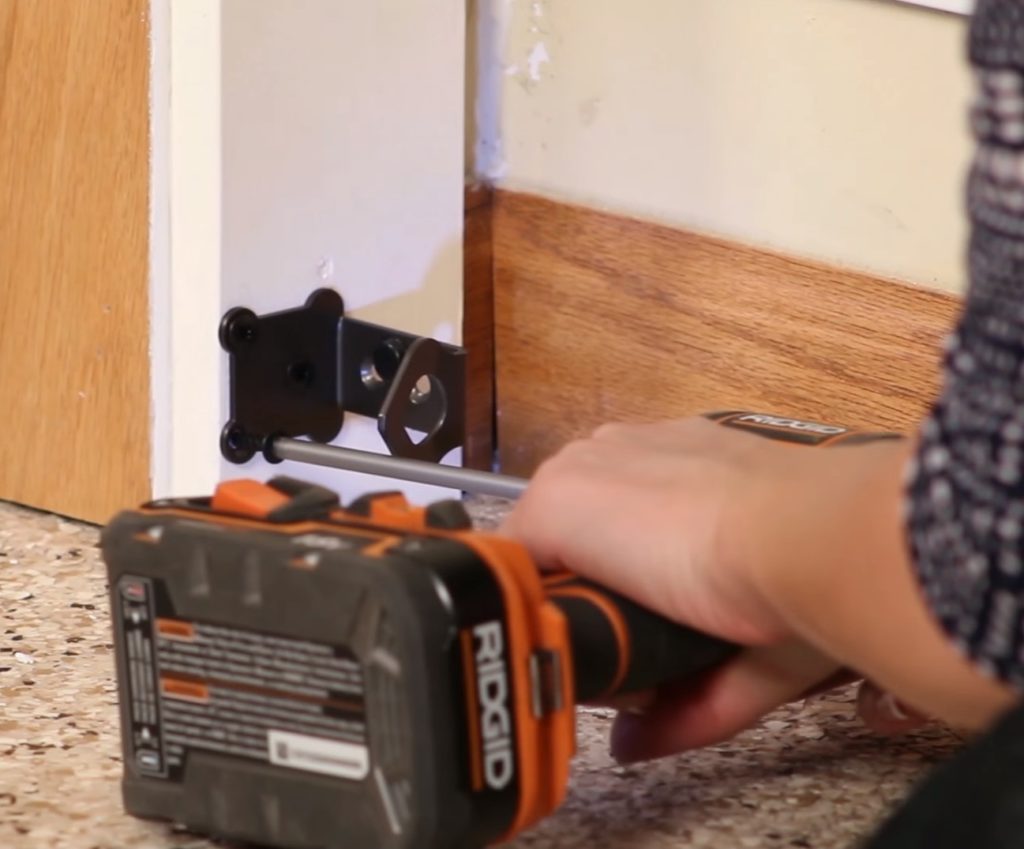
- Pre-drill the holes and fasten the door stop using the fasteners included in the Door Stop Kit.
Center Guide
- Secure the Center Guide to the trim using the fasteners included in the Center Guide kit.
Note: This guide should be positioned so that it can hold the door in place both in the fully opened and fully closed positions.
Door stop #2
- Align the second Door Stop and fasten it to the trim using the same method as the first Door Stop.
That’s it! Enjoy your beautiful new rolling barn door! (If you haven’t purchased a barn door or rolling door hardware kit yet, click here)

