Spray guns are wonderful tools for finishing a surface really quickly and evenly, but cleaning them up can be a bit of a hassle. Here’s how to do it easily and safely!
Note: if you watched the video and want to skip to the additional information the video did not cover, scroll down to Part 2: Clean Individual Components
Part 1: Initial Cleaning
-
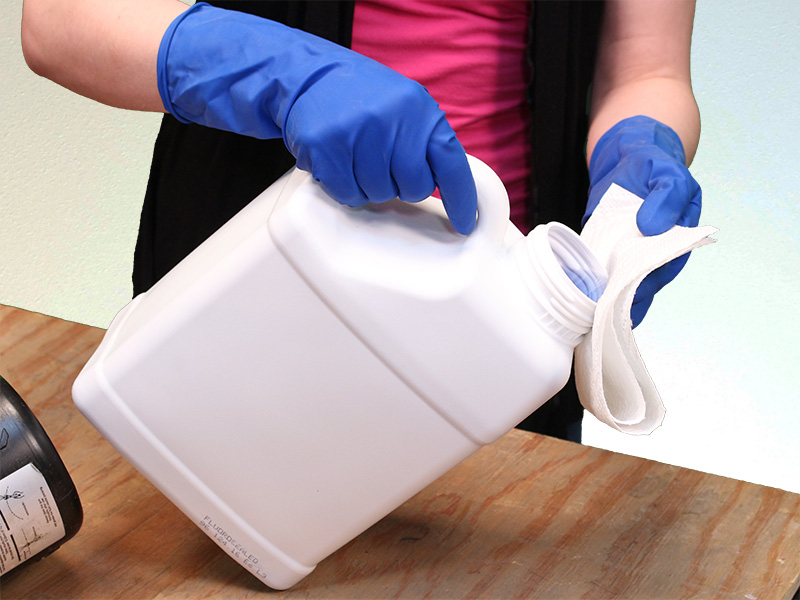
The first step in cleaning out a paint spray gun is to get rid of the leftover paint in the can. Before doing this, be sure to put on the appropriate safety gear (such as gloves and safety glasses) for working with strong chemicals and fumes.
-
If you’re working with water-based paint, put a small amount of General Finishes brush and gun cleaner or waste thinner on a rag and wipe out as much paint as you can from the container and lid. If you’re working with oil based paint instead, use mineral spirits for this. Doing a good job of this will make it much easier to clean out the rest of the gun.
-
Fill the cup with the brush and gun cleaner, and secure the lid back on the cup. Shake the paint gun vigorously to coat the inside of the cup with the cleaner to dissolve any paint left inside.
-
Run that cleaner through the gun by spraying it out. Find a safe, well-ventilated area and squeeze the trigger of the gun just like you normally would when painting with it. Repeat this process a few times in order to thoroughly clean out your spray gun, and wipe down all parts until they’re dry. Also make sure you lay out the rags from inside the can in a well ventilated area before disposing them.

To minimize the mess and fumes involved in the last step, you can try this solution from woodworkingtips.com: grab an old 3 lb coffee container, drill a hole in the top to stick the nozzle of the gun into, and fill the container with paper towel or old rags. If the container you’re using doesn’t have any good place to grip, you can even attach a cabinet handle to the side for some extra control. Now you can spray your cleaner into this convenient can instead of making a mess!
Part 2: Clean Individual Components
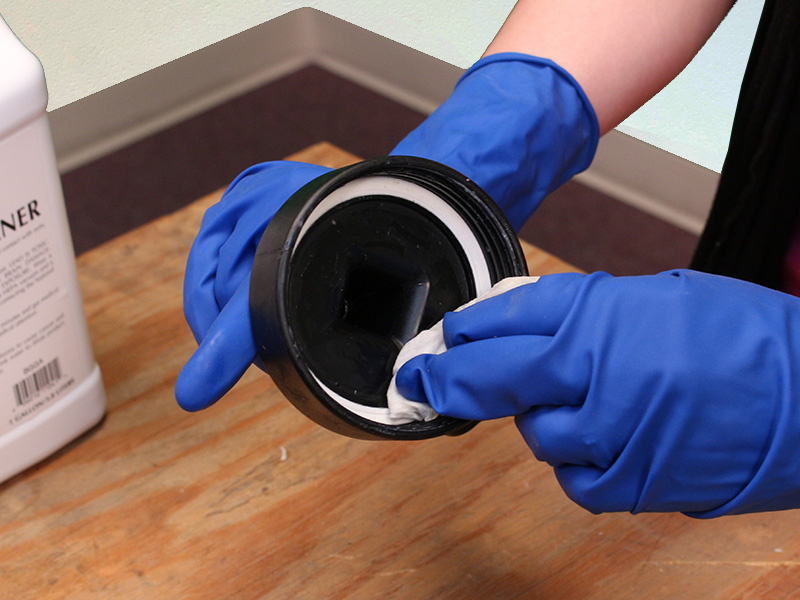
In order to thoroughly clean your gun, you’ll need to take it apart. For each of these following steps, clean all parts with your GF brush and gun cleaner, waste thinner, or mineral spirits as you remove each component.
-
Remove paint cup and lid (turn it counterclockwise)
-
Remove the fluid adjustment knob (it’ll be somewhere on the rear of the gun, often the middle knob), and then remove the spring that is revealed once the knob is gone.

-
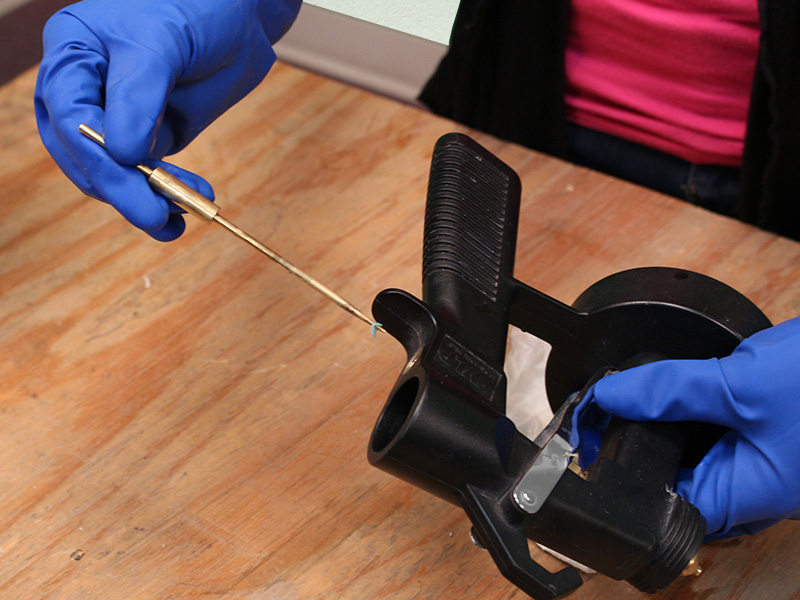
Pull the trigger and pull the fluid needle straight out. This is important to avoid bending or damaging the needle while removing other parts.
-
Remove the air cap on the front of the gun (turn it counterclockwise), then remove the fluid nozzle as well.
-
Once you’ve finished removing and cleaning each of the above parts, wipe the gun dry and rinse with cleaner/mineral spirits. This includes gun body, cup lid, air cap, and all parts that have remaining paint (except for air gaskets, if applicable)
-
Finally, reassemble all parts and wipe off any excess liquid


This process can be a bit tedious, but if you do it well, you can be sure your gun will be clean and function properly.