Background

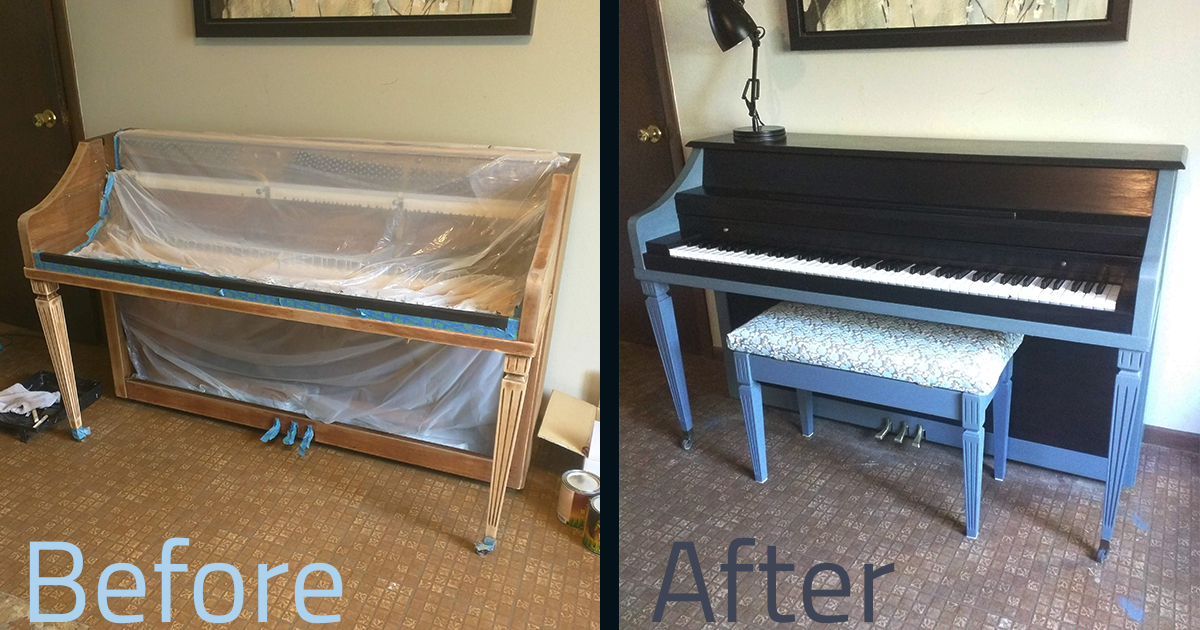
This piano has been through three generations of my family! It was purchased by my grandparents in 1970. That is my dad in the Packer pajamas above (quite the rebel). He learned to play on this piano, as did I after my dad inherited the piano from my grandparents.
This piano traveled with my grandparents from Indiana to Florida, and then with my dad from Florida to Illinois and back to Florida, and then with me and my husband from Florida to Wisconsin after we got married. Needless to say, there was quite a bit of wear on it, but it also had too many memories to just take it to the dump.
So, in wanting to preserve these memories and provide a beautiful and functional piano for my future children to learn music on, I turned to Custom Service Hardware for the right stains for this HUGE refinishing endeavor. They provided me with the General Finishes Water-Based line of stains that gave me EXACTLY the look I was going for! Now that we have it all assembled, I am so excited to get the piano tuned up and ringing through our house for many, many more years to come!

How To:
Take Apart the Piano
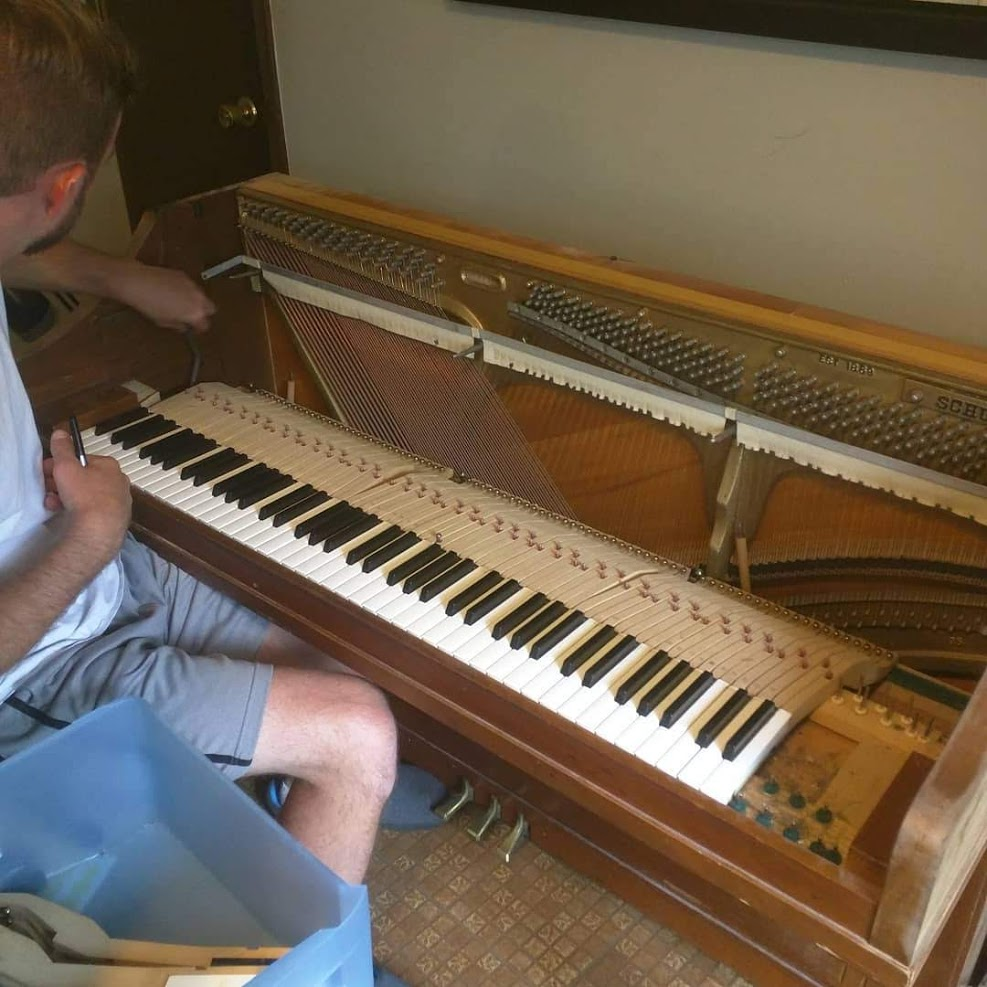
- This will be different for every piano. Research how to take apart your specific style/brand of piano to make sure you don’t damage any important parts (here’s an example).
- Set aside all of the hardware pieces so you don’t lose them.
- Make sure the piano keys are numbered (usually on the wood directly above the key) for easier assembly
- Set aside all of the pieces you will be staining/painting
Sand It Down
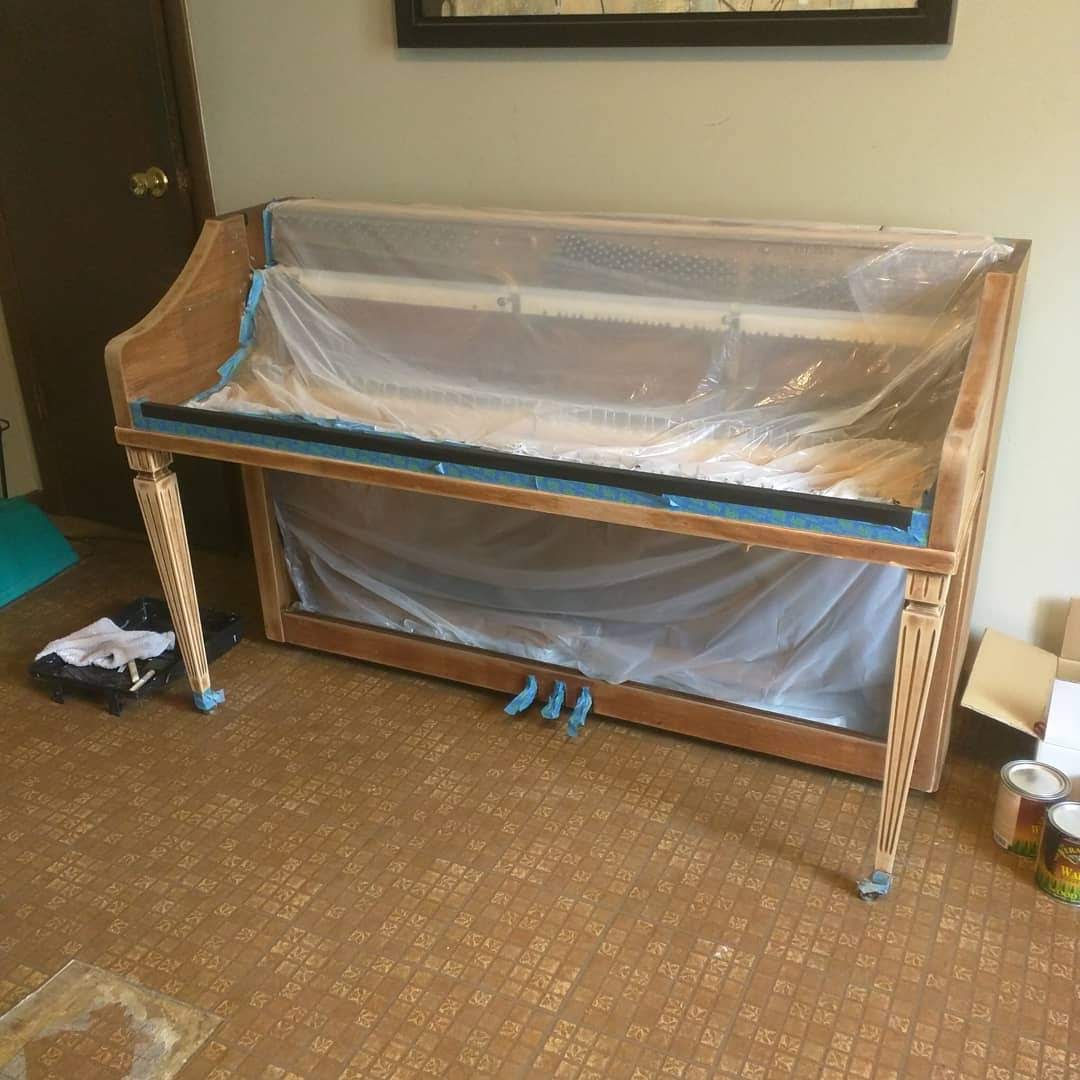
- Cover the interior pieces of the piano in plastic wrap and painter’s tape to avoid getting dust or stain inside the mechanisms or on the remaining hardware. You want the piano to work after refinishing it!
- Follow the instructions on the back of the General Finishes can to get the right sanding grits.
- Be careful sanding on veneer pieces! Because most pianos have veneer pieces, you’ll need to be much more delicate in sanding (preferably hand sanding) to make sure you don’t sand off the veneer completely.
- Dust the piano/pieces off COMPLETELY (using a tack cloth like this one will help you make sure the surface is completely clean before staining)
Stain or Paint It
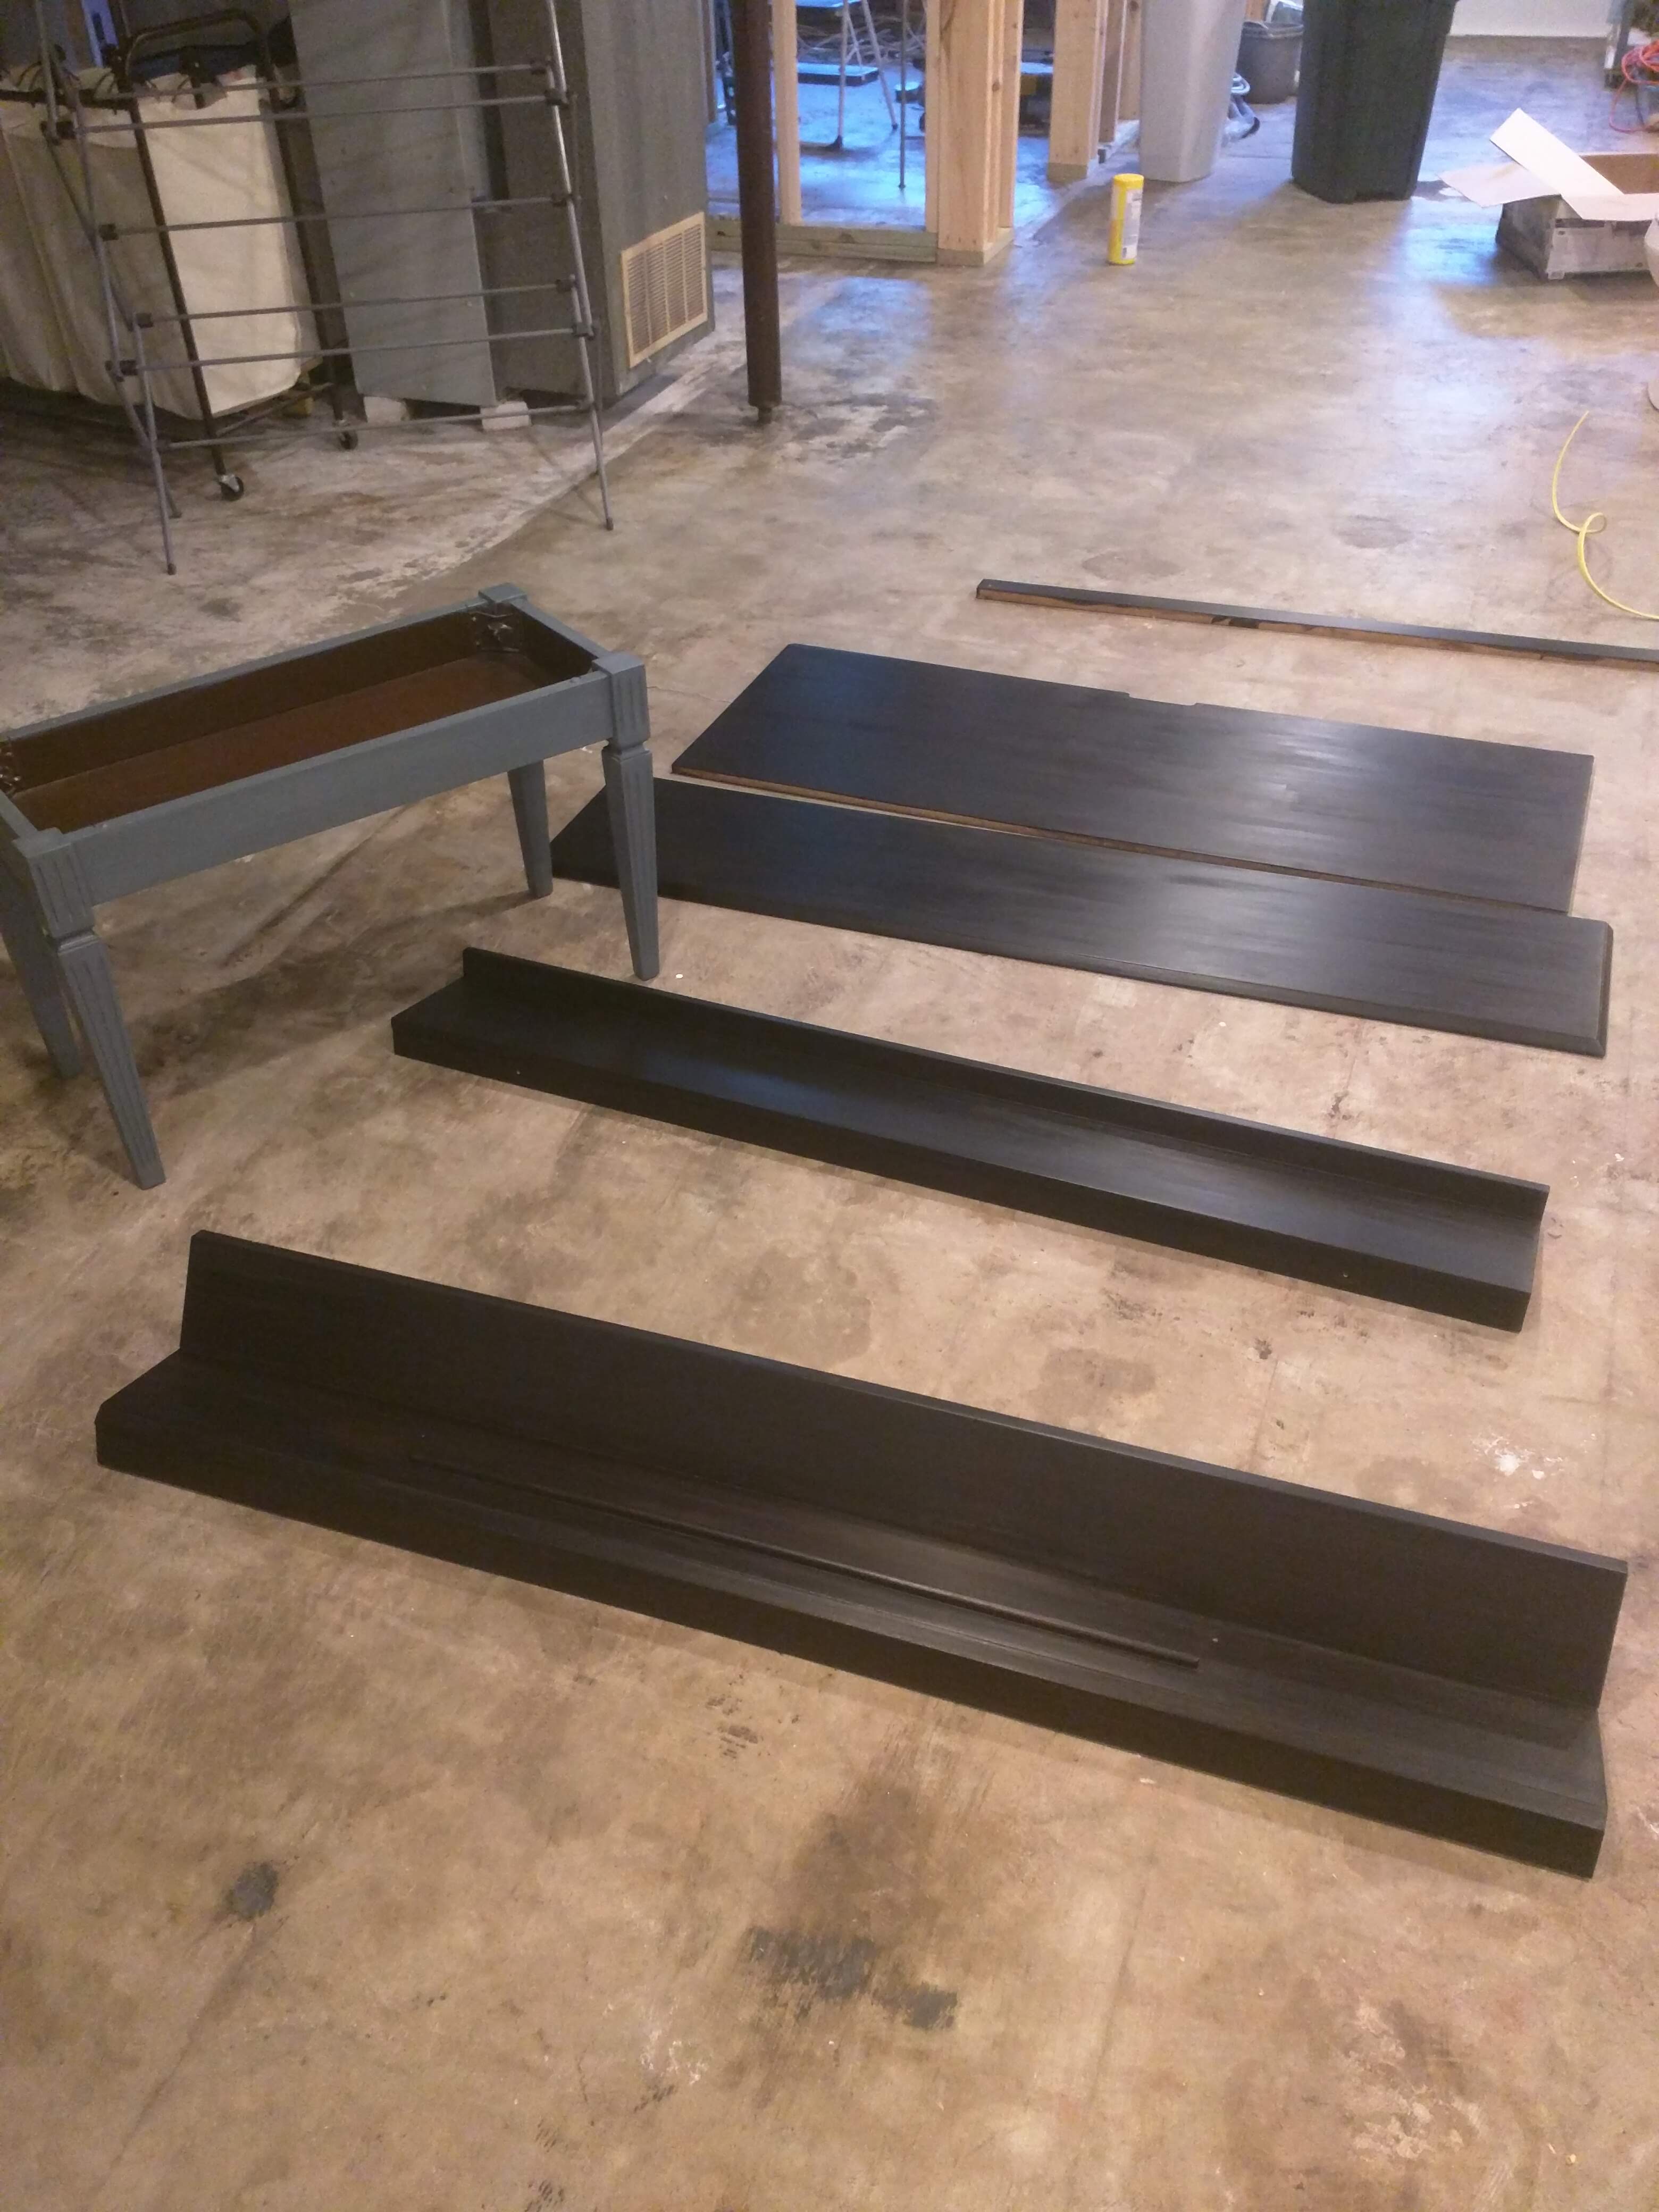
- Follow General Finishes’ instructions on staining and painting the materials. I used two coats of General Finishes Water-Based stain for both the walnut and weathered gray stains. Important: do NOT Sand in between stain/paint coats.
- Follow General Finishes’ instructions on applying a top-coat to the piano/pieces.
- Sand (with a flexible sanding pad) in between top coats. Don’t sand too hard; use a very light touch until you just start to get a light dusting on the surface of the wood.)
- Dust off and apply another layer of top coat. I did three layers, but more can be done if you want the surface to be even more protected and sealed!
- Let the pieces cure for a few days before reassembling.
Reassemble It
In reverse order of disassembling, reassemble the piano pieces back together. It may be easiest to take pictures of each step of the disassembling so you remember how to put it back together. I thought this project would take me half of a week; but with its complexity, it took 3 weeks to complete! So remembering how to put it back together was difficult!
